


What is Software Localization: All You Need to Know
12 min read
Node.js is a server-side environment for delivering scalable JavaScript apps and services. It’s quickly gaining popularity, having been used by Netflix, PayPal, LinkedIn, and others. In this post, we’ll show you how can use Transifex to easily localize your Node.js apps.
While there are several modules for localizing in Node.js, we recommend the i18n-node module. i18n-node stores localization data in standard JSON, making it easy to pass text to and from Transifex.
i18n-node is a simple translation module for integrating localization into a Node.js app. Each locale stores its translations in a separate JSON file, which you’ll use to send localization data to and from Transifex. You can add i18n-node to your project using npm:
$ npm install i18n
Load i18n along with the rest of your modules:
// load modules
var http = require('http'),
      i18n = require('i18n'),
      ...
To configure i18n, specify the locales you want to include in your project and the directory where the localization files will be stored. You can also specify a default locale, a unique extension for newly created localization files, and more. A full list of options is available on the i18n-node GitHub page.
In this example, we’ll store English, Spanish, and German language files in the locales directory under the current directory:
i18n.configure({
	locales:['en', 'es', 'de'],
	directory: __dirname + '/locales',
	defaultLocale: 'en',
	extension: '.json'
});
i18n-node supports both shorthand locale codes and IETF language tags. For example, to specify British English, change “en” to “en_GB”.
You can reference a localized string by using the global i18n keyword. For example, if you have a variable that stores the string “Hello”, you can replace it with a localized string using i18n.__(keyword):
// Hard coded string
// var greeting = 'Hello';

// Localized string
var greeting = i18n.__('Hello');
The exception is when responding to http requests, in which case you can attach the reference to the request object. For example, let’s create a simple web server that displays “Hello” to the user:
app = http.createServer(function(request, response) {
	i18n.init(request, response);
	response.end(response.__('Hello');
});

app.listen(3000, '127.0.0.1');
i18n automatically generates the default locale using the keyword provided. When the app starts, i18n creates three new files:
Further down, we’ll show you how to connect your app to Transifex using the Transifex client.
RequireJS provides its own i18n implementation that can also be imported into Transifex. If your Node.js app uses RequireJS, add the i18n.js plugin to your project.
Similar to i18n-node, RequireJS uses JSON to store translations. However, rather than using a standard JSON Key-Value file format similar to i18n-node, RequireJS actually defines the key-value set as an object.
RequireJS searches for localization files in the “nls” folder under the project directory. Additional languages are stored in separate directories and are enabled by adding the language to the main file.
For more details on localizing with RequireJS, see the RequireJS documentation on i18n.
The Transifex Client makes it easy to move translations between your app and Transifex. If you don’t already have the Transifex Client installed, follow the instructions here.
Start by creating a new Transifex project using the JSON Key-Value (.json) file format. The en.json file will act as our source file. Once you’ve created the project, use the Transifex Client to create a local repository in your app directory:
$ cd myapp
$ tx init
tx init creates a .tx directory in the current folder with a basic config file. We’ll set up the configuration by specifying the directory where localized files are stored, setting en.json as the initial localization resource, setting English as the source language, and specifying standard JSON as the file type.
Transifex_project_slug specifies the URL slug for your project, while default_resource_slug specifies the URL slug for the default resource. You can find both of these in your project page.
[main]
host = https://www.transifex.com

[Transifex_project_slug.default_resource_slug]
file_filter = locales/.json
source_file = locales/en.json
source_lang = en
type = KEYVALUEJSON
Finally, push any local changes to Transifex using tx push -s. The -s flag tells the Transifex Client to update the project with the source file.
$ tx push -s
Pushing translations for resource nodejs-test.enjson:
Pushing source file (locales/en.json)
Done.
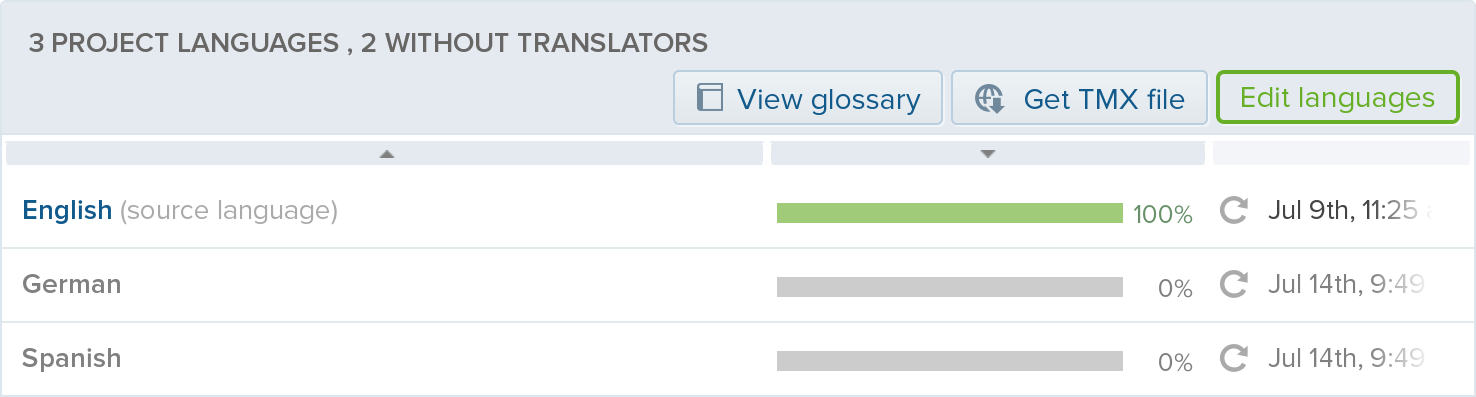
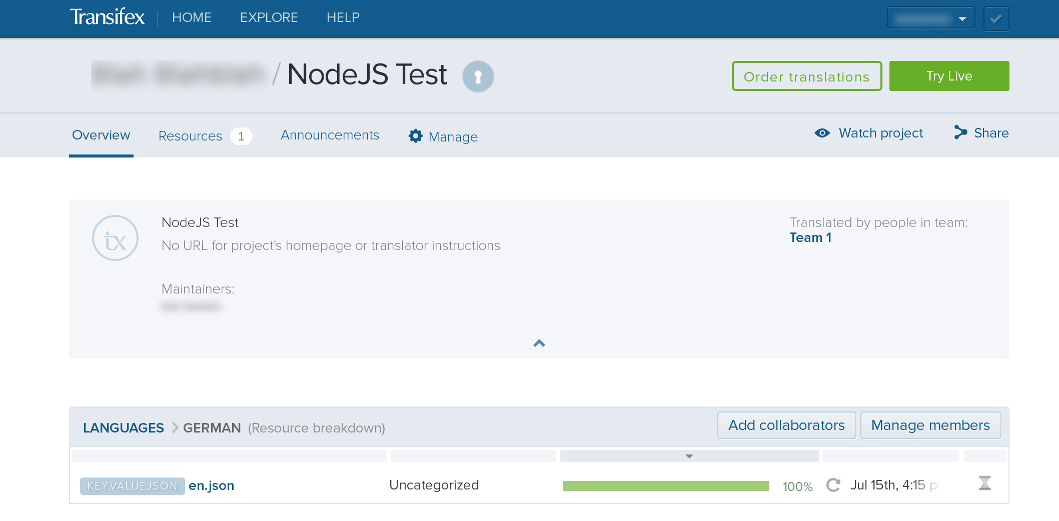
The project page should reflect the updated source file:

Now that your source file has been pushed to your project, you can use Transifex to start localizing. We’ll show you how to add new languages, update translations, then push the changes back to your Node.js application.
If your app already contains translations, you can push those translations to Transifex using the Transifex Client. Use tx push with the -t flag instead of the -s flag to push any existing translations to your project.
$ tx push -t
Pushing 'de' translations (file: locales/de.json)
Pushing 'es' translations (file: locales/es.json)
Done.
For smaller projects, it may be easier to create a new translation and enter any existing translations as comments. For more information on how you can do this, see the Transifex Editor tutorial.
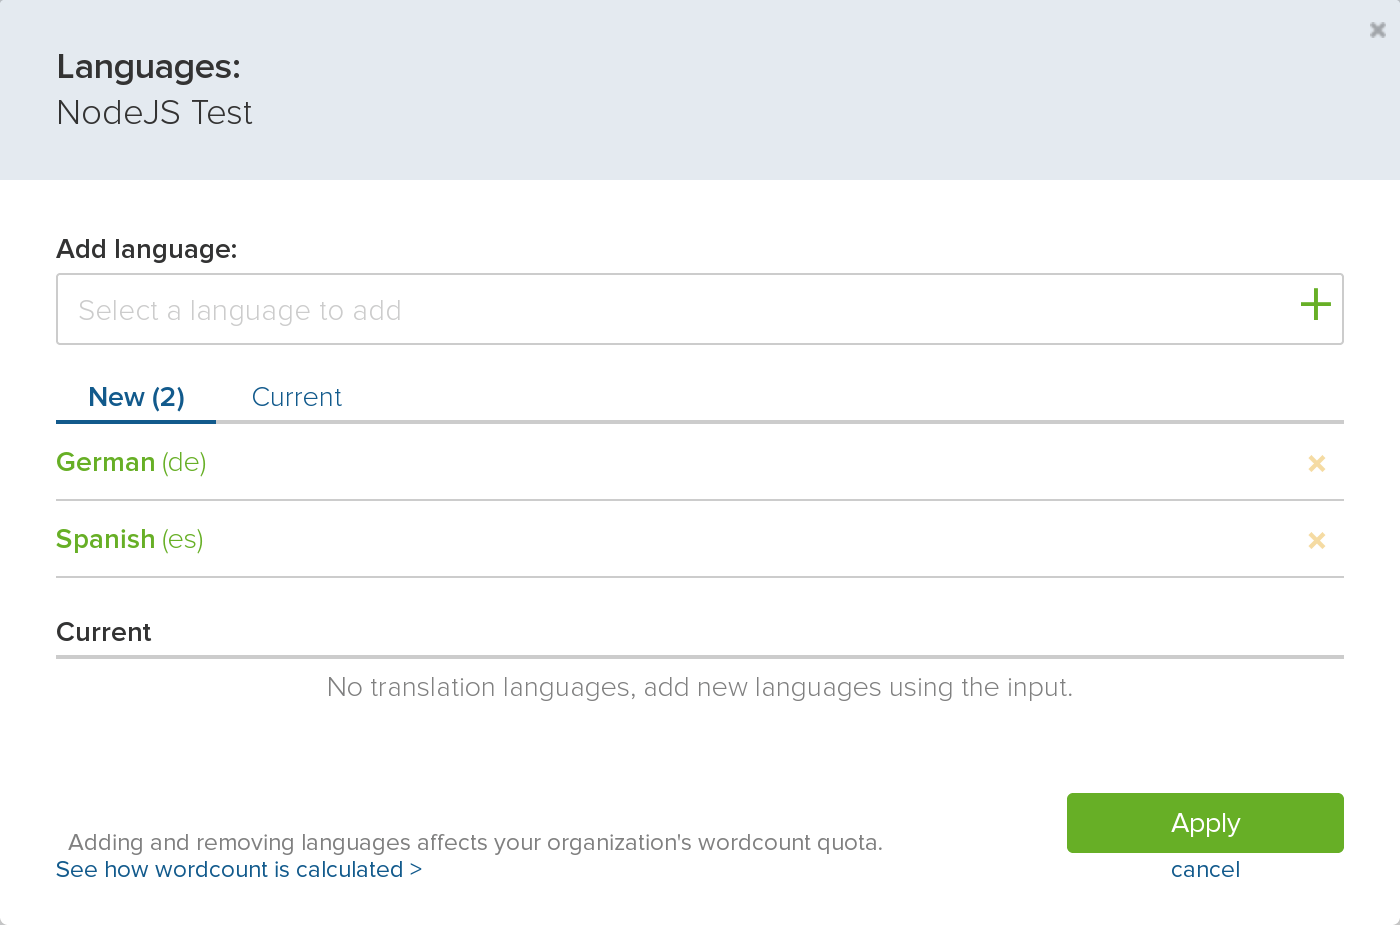
Begin by clicking “Edit Languages” in the Project Languages table:

In the popup window, enter the languages that you want to add to your project. In this case, we’ll add Spanish (es) and German (de). As you type, the search box will filter based on the name of the language. You can also specify locales such as Latin American Spanish (es_419) or Austrian German (de_AT). When you’re ready, click Apply.
Your new languages will appear in your project dashboard. Since no work has been done on them, they’ll both appear at 0% completion. You’ll also see that no translators have been assigned to the new languages. You can learn more about adding translators through the People page.
Let’s start by filling in our German translation. Clicking on the German language will bring you to the resource page. The en.json source file is shown along with its category and completion. From here, you can also assign and manage the project’s team members.
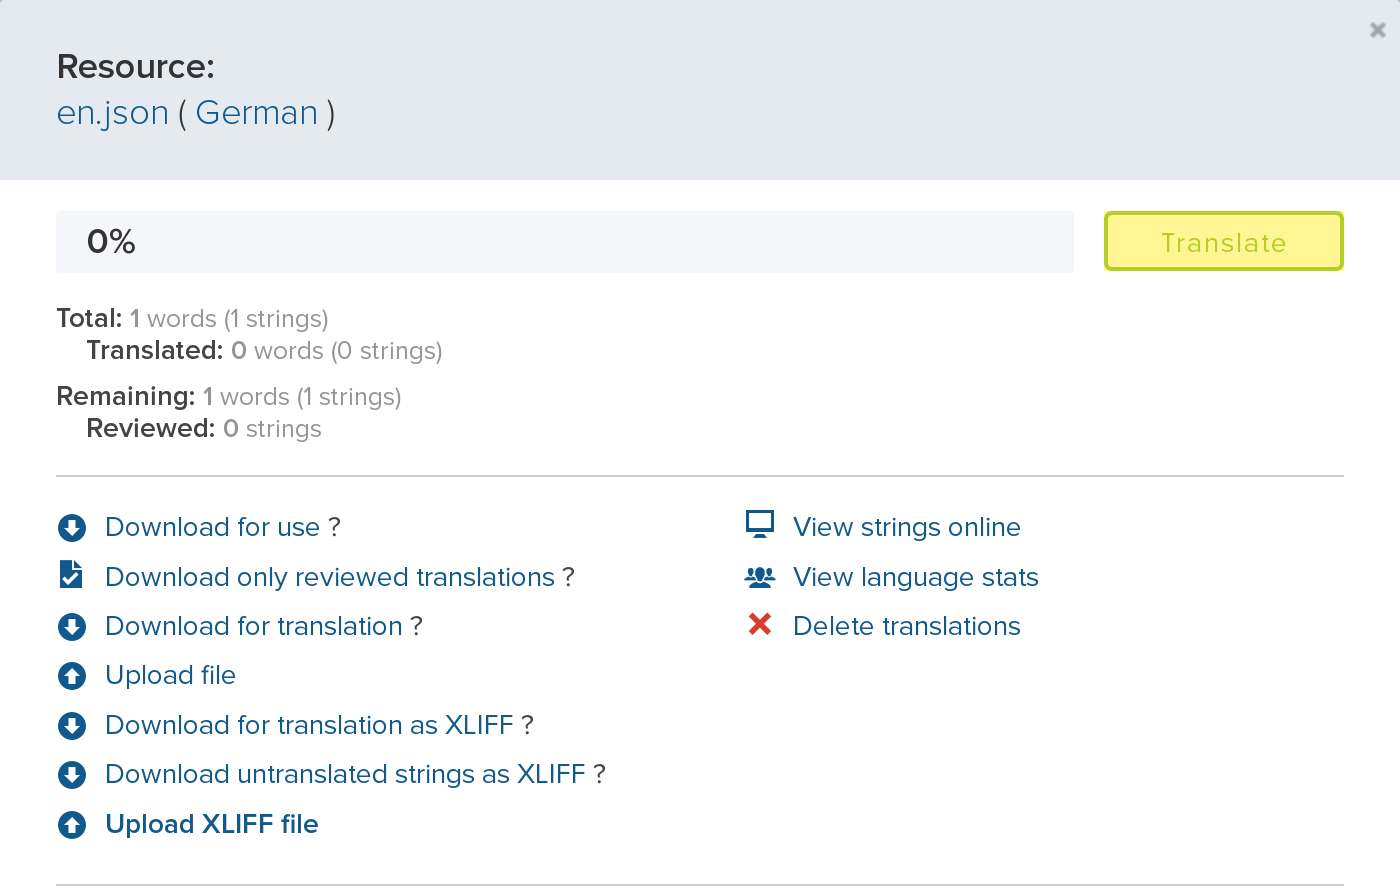
Click on the en.json resource, then click Translate in the popup window:
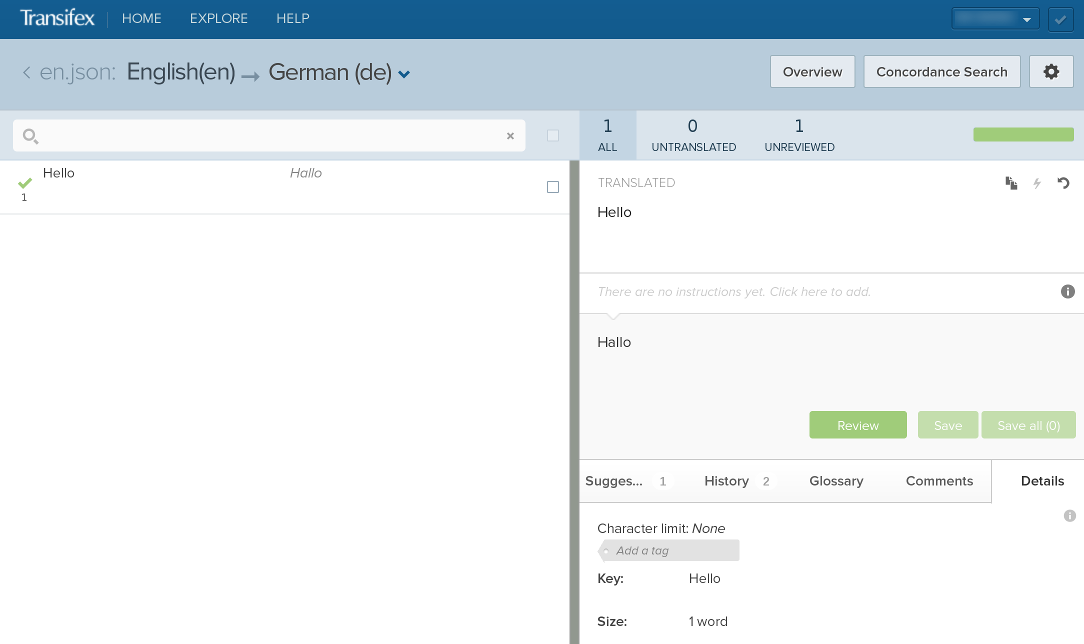
This will bring you to the Transifex Editor, where you can modify and review your translations. The left-hand panel shows the strings provided by your resource file. In this case, we only have the one string, “Hello”. The right-hand panel provides tools for entering and reviewing translations. Additionally, you can view suggested translations, read through a history of translations, add comments or instructions, and more. You can learn more about the Transifex Editor through the Editor tutorial.
When you’re ready to translate, select “Hello” so that it appears in the right-hand panel under “Untranslated String”. Type “Hallo” in the translation box underneath the string and press the Tab key or the Save button. The translation will be marked as unreviewed until it can be verified by a reviewer or manager. In the meantime, do the same for the Spanish translation by switching to the Spanish resource and entering “Hola” in the translation box.
The project dashboard will now show the languages as pending review. Next, we’ll sync the new translations back to Node.js.
Using the Transifex Client, you can pull changes back to your Node.js app with tx pull:
$ tx pull -a
New translations found for the following languages: de, es
Pulling new translations for resource nodejs-test.enjson (source: locales/en.json)
 -> de: locales/de.json
 -> es: locales/es.json
Done.
You can verify the results by checking your es.json and de.json files. If the process was successful, you should see a new key-value pair for each language.
$ cat locales/es.json locales/de.json
{
	"Hello": "Hola"
}{
	"Hello": "Hallo"
}
With that, your Node.js app is ready to go! If you’re using i18n-node, you can test your configuration using i18n’s the setLocale() function:
i18n.configure({...});
i18n.setLocale('es');
app = http.createServer(...);
There are other ways to interact with your Transifex project through Node.js. node-transifex is a community module that provides an easy interface to the Transifex API. After adding your project name and user credentials to node-transifex, you can use the module’s built-in methods to pull data about your Transifex project. For instance, as a project owner, you can use the languageSetMethod() function to return a list of the project’s languages along with the coordinators, translators, and reviewers for each language.
node-transifex also allows statistics gathering, such as the percentage of items that have been translated and the percentage of items that have been reviewed. You can gather statistics for the entire project, or for a specific language.
Install node-transifex using npm:
$ npm install transifex
Then, initialize the module with your project name and credentials:
var Transifex = require("transifex");

var transifex = new Transifex({
    project_slug: "myProject",
    credential: "username:password"
});
For a list of available functions, see the node-transifex GitHub project page.