


TX Labs: A Space for Accelerated AI Innovation
3 min read
Earlier this week, we shared a post about integrating Transifex with Bitbucket. In addition to Bitbucket, Atlassian offers a continuous integration server called Bamboo. Bamboo lets you automatically setup, build, and deploy projects. Integrating Transifex with Bamboo lets you update your project’s localization files in an automatic and seamless way.
The Bamboo workflow is split into five components:
For more information on Bamboo’s structure, read the Atlassian documentation for Bamboo.
Bamboo can be installed on a server or hosted on a cloud instance. This article assumes Bamboo is being installed on a server.
Navigate to Bamboo’s download page and download the executable for your server operating system. From there, navigate to Atlassian’s documentation site to find more information on installing Bamboo for your particular OS. When the installation is finished, access Bamboo by opening a web browser and navigating to http://<server IP address>:8085. You may need to open the port in your server’s firewall.
Bamboo requires a valid license before it can start. After Bamboo verifies the license, it will ask you to create a new administrator account for the Bamboo agent. Once the account setup is complete, you’ll be greeted by the Bamboo home screen.
To create a new project, click the Create button at the top of the screen, then click “Create a new plan.” This brings you to the plan configuration screen where you can enter details about the new project. We’ll create a new project for our Node.js app:
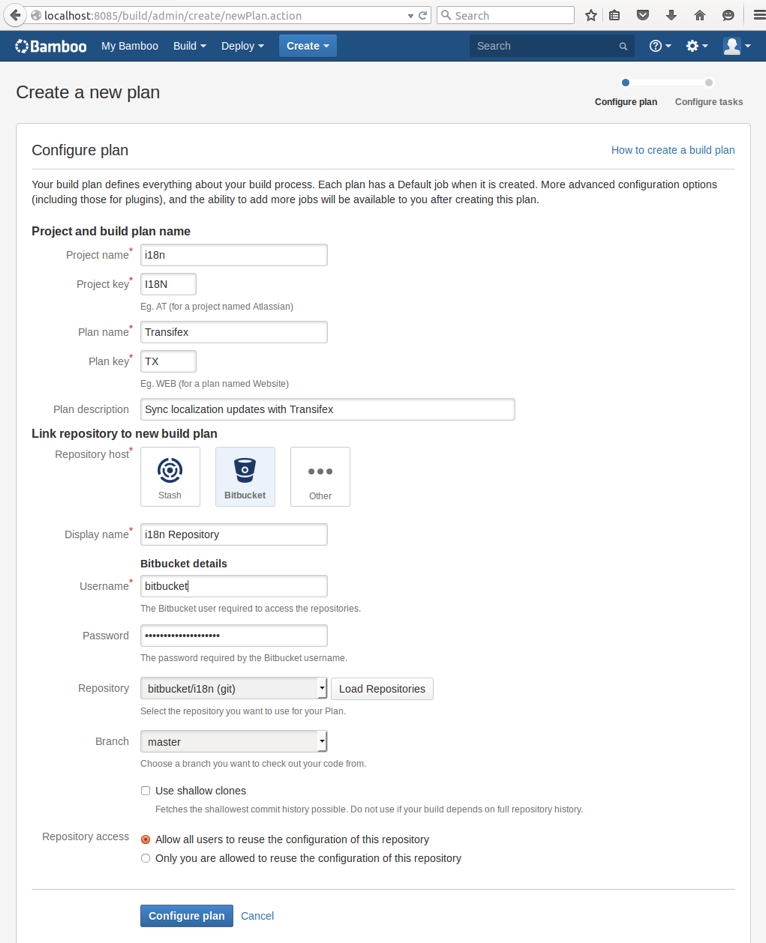
Click “Configure plan” to create the new project. Along with the new project and plan, Bamboo creates a default stage and a default job. Since we specified a Bitbucket repository, Bamboo automatically creates a task to retrieve the source code from the repository. Next, we’ll add tasks that synchronize the source code with Transifex using the Transifex Client.
To run the Transifex client during the build process, we need to add a new task to our default job. Bamboo supports a variety of tasks for generating logs, deploying to cloud services, or even executing Maven or Ant tasks. In this case, we’ll use the Command task to run a command that calls the Transifex Client.
Before we do this, we need to register the Transifex Client as an executable. Navigate to the Bamboo administration page by clicking the gear icon in the top-right corner of the screen, then click “Overview”. Under the “Build Resources” section on the left-hand navigation menu, click “Server capabilities.” This will show you the actions available to the Bamboo server, including the executables available to your build plan.
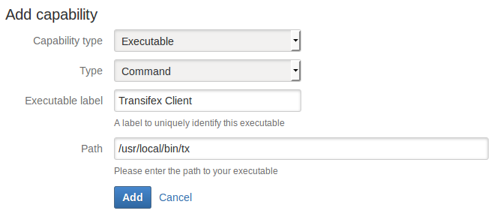
Scroll down until you see the “Add capability” section. Under “Capability type,” select “Executable,” then select “Command” for the type. Enter an identifier for the command, followed by the path to the executable that you want to run (in Ubuntu Linux, the Transifex Client executable is found at /usr/local/bin/tx). Click the “Add” button to register the new executable with Bamboo:
Navigate back to your project by clicking “Build” at the top of the screen, then “All build plans.” Edit the project by clicking the pencil icon on the right-hand side of the screen, across from the project name. Under “Plan Configuration”, click on the default job. Switch to the “Tasks” tab, then click the “Add task” button. Bamboo prompts you for the type of task to add:
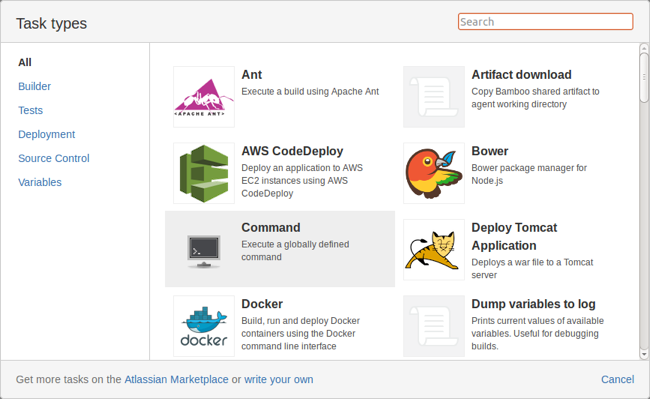
Click the “Command” task and select the “Transifex Client” executable we defined earlier. In this task, we’ll push the latest source files to Transifex. Under arguments, type “push -s.” Add a small description, then click Save. Repeat this process to create a new command that pulls the latest translations from Transifex using the command tx pull -a.
Note that you may need to specify the “Working Sub Directory” field before the command will successfully execute. The working subdirectory tells Bamboo to run the command in a folder relative to the project’s root folder. If your Transifex configuration is stored somewhere other than in the project’s root directory, you’ll need to specify the directory here. The best way to determine this is to run the Transifex Client in your project, note which subfolder you ran the command in, then enter that subfolder as the working subdirectory.

Next, we’ll run the plan and generate a new build.
To generate a new build, click the “Run” button in the top-right corner of the screen. Your build will begin in the background, and the results will be displayed in the Build Dashboard.
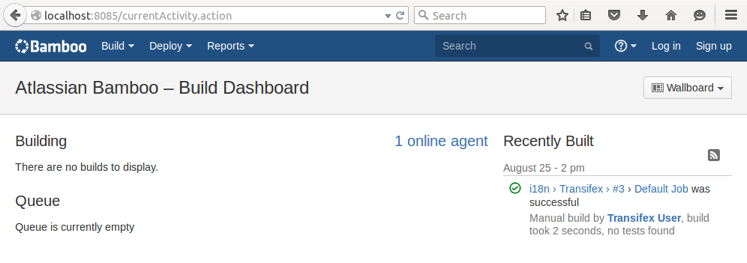
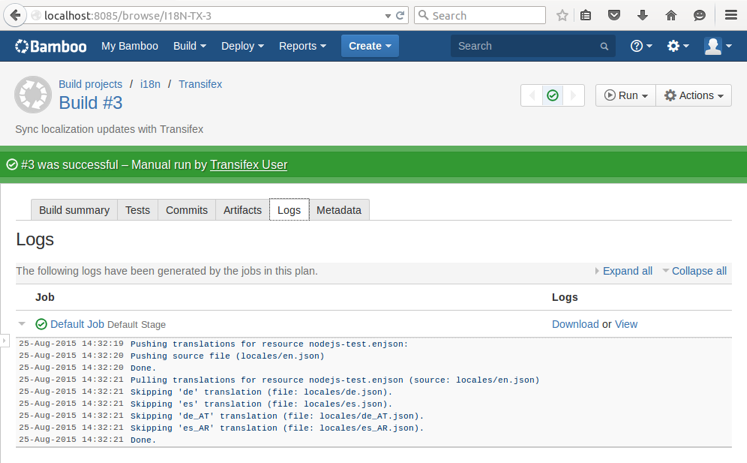
Click into the build to see the results. If it was successful, you should be able to see the output from the Transifex Client in the Logs tab.
You can use this same process to integrate Transifex into an existing Bamboo project. Once the Transifex Client is registered as an executable, add two tasks to your project that call the tx push and tx pull commands. Make sure you do this earlier enough in your build process so that you can reliably test and package the localization files with the rest of your project.
For more information on integrating Transifex into your projects, review the Transifex Integrations.