


TX Labs: A Space for Accelerated AI Innovation
3 min read
TL;DR: Both Grunt and Gulp can be used to automate the download of translation files and quickly enable agile localization for your organization. In this post, we’ll cover a few detailed sample configurations and give code examples of how Grunt and Gulp can be used.
Grunt and Gulp are free, Open Source projects typically used to automate building and deploying of JavaScript applications. They can also be used to help with automating translation tasks for localization. These localization processes can be used for JavaScript projects, or even projects using a different technology stack altogether. The strength of these tools primarily comes from how easy it is to get them up and running.
Before diving into Grunt and Gulp, there are a few prerequisites we’ll need to set up: the NodeJS programming language and the NPM package manager. If you aren’t familiar with these tools, you can find the Getting Started guide for Grunt here and for Gulp here.
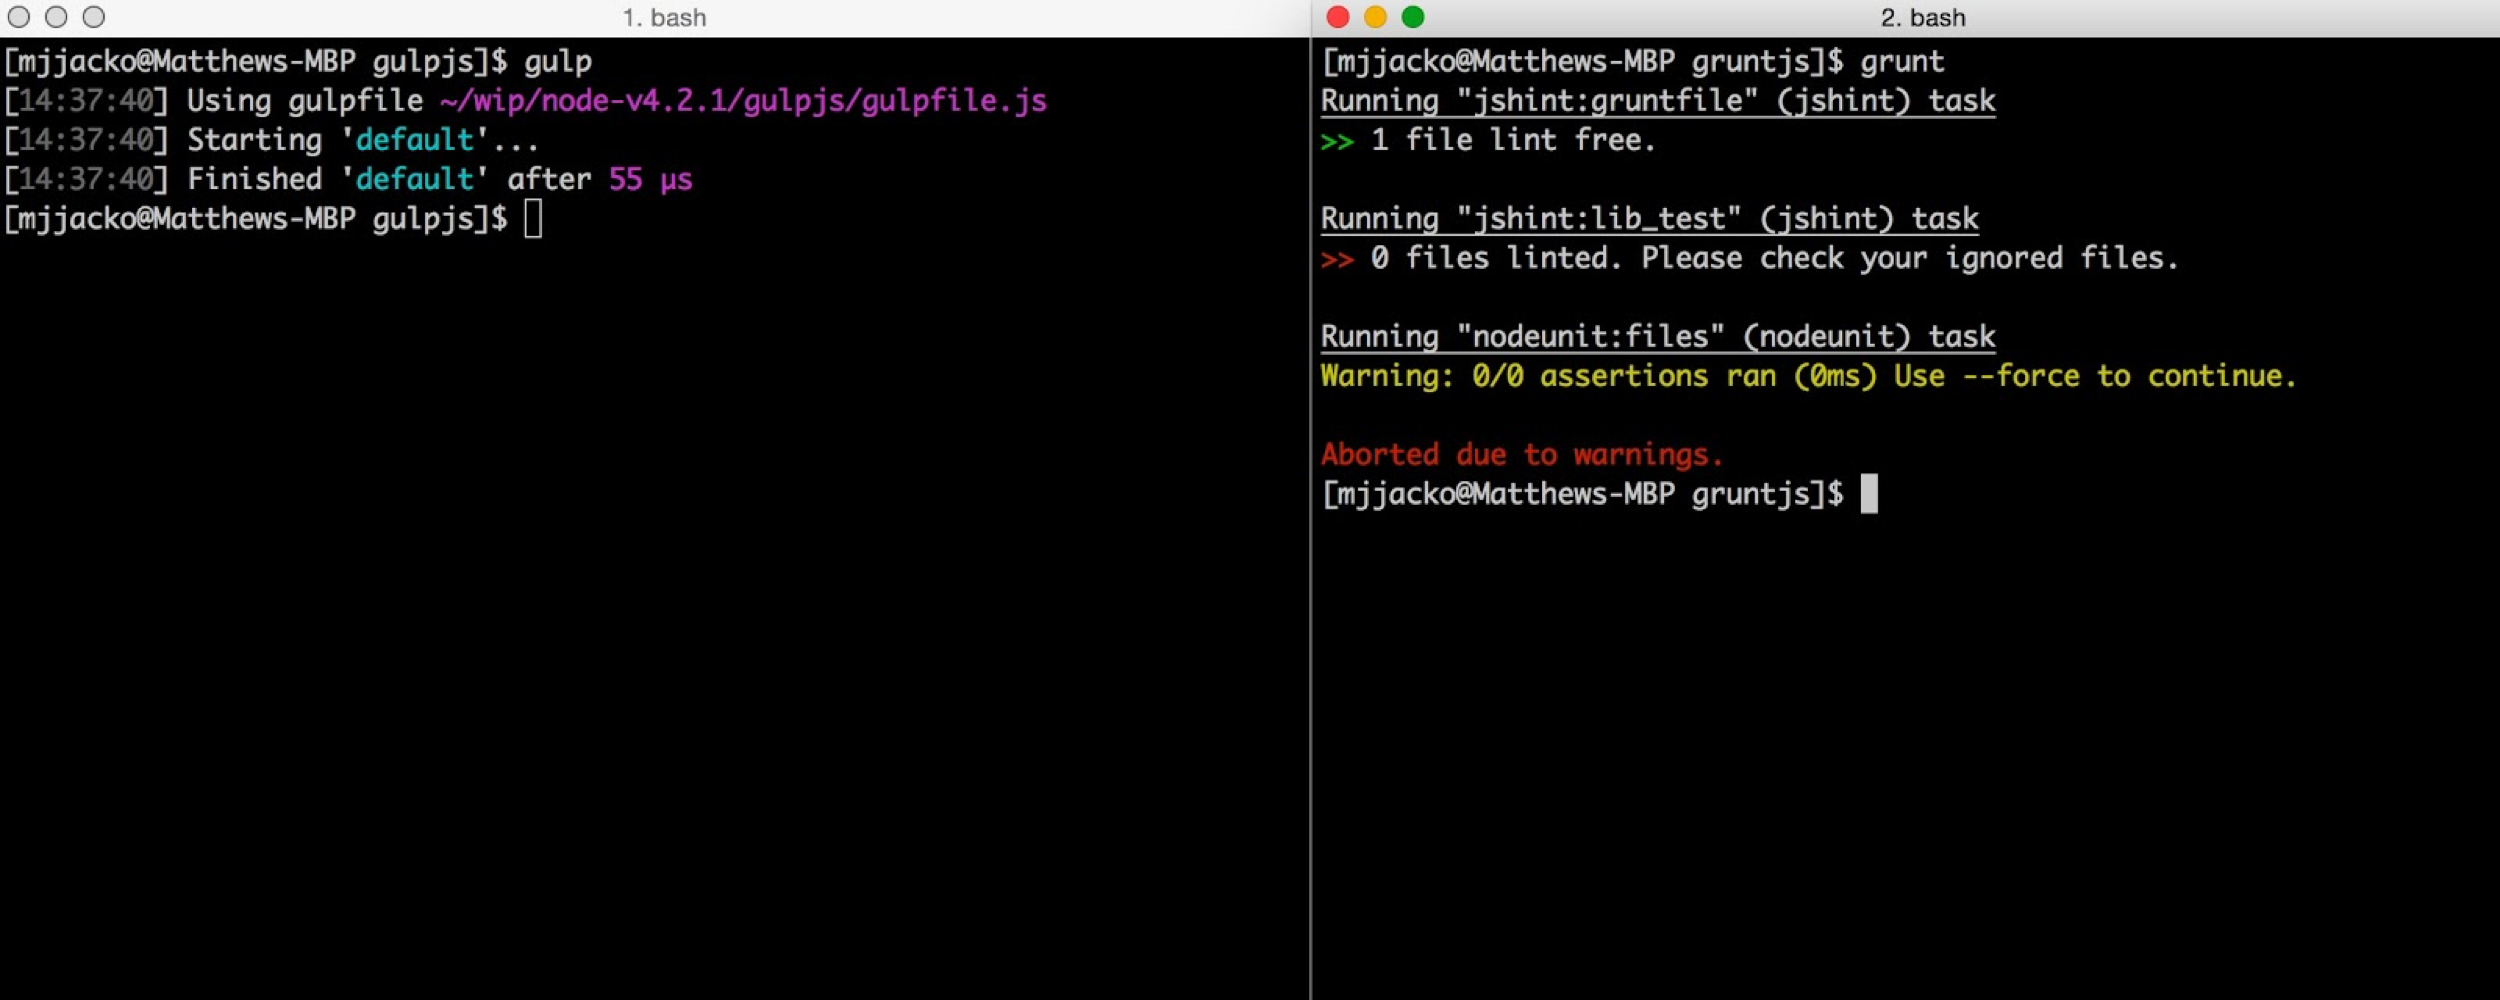
Once you have Grunt and Gulp installed and set up with a default configuration, test and make sure you are able to run them without any task setup (see screenshot below). This is an important step because as you set up your localization process, there will be a number of configuration options. By testing Grunt and Gulp first, you will know that any issues lie in the localization configuration and not the initial project installation.
Next, you’ll need to identify your source translation files. These could be a number of different formats depending on your project. Often they will be JSON files, but since Grunt and Gulp are merely handling the “grunt work” of building your project, this can easily be extended to other file types such as, XML, PO and HTML formats.
After you have established the source files that need to be translated, you’ll need to decide where to put the resulting translation files from the localization process. Often these files can be located under a subdirectory called “translations.” The important part of this step is to decide a naming convention that includes the locale designation. A locale is usually a 2 or 4 letter code that represents language and region. For example: en is used to indicate the English language generally, and en_US or en_UK is used to indicate the regional use of this language. Your translation files will need to implement this locale designation either in the filename (i.e. index_de.html) or in the directory (i.e. /translations/de/index.html).
Next, we need to decide how our translators are going to receive the source files and then send back the translated files. The easiest way to do this is to use a Translation Management System like Transifex to help manage the linguistic portion of the localization process. Transifex provides plugins to both Grunt and Gulp which make configuration much easier. You can also use other approaches such as file transfer using sFTP or scp. In this post, we will focus on using Transifex for our translation management.
For both Grunt and Gulp, Transifex has a number of community-created plugins. It’s important that you set up a project, upload the initial resource, and assign translation languages and teams in Transifex before continuing the configuration of Grunt and Gulp. If you don’t have a fully setup project in Transifex, be prepared to work through some minor “gotchas.”
When you first use the grunt-transifex package, you’ll be prompted to enter your credentials which will be saved to a “.transifexrc” in your home directory. The rest of the configuration occurs inside the Gruntfile.js. Below is an example of this setup for at test project.
// Project configuration.
  grunt.initConfig({
  ...
    transifex: {
      "grunt-test": {
        options: {
          targetDir: "./translations",
          resources: ["samplejson"],
          languages: ["fr"],
          filename: "sample-_lang_.json"
        }
      }
    }
  });

  grunt.loadNpmTasks('grunt-transifex');
Our project directory structure looks like this:
├── Gruntfile.js
├── package.json
├── sample.json
└── translations
    └── sample-fr.json
Don’t forget to load the grunt-transifex task at the end of the Gruntfile.js !
Now, our example task can be run like this:
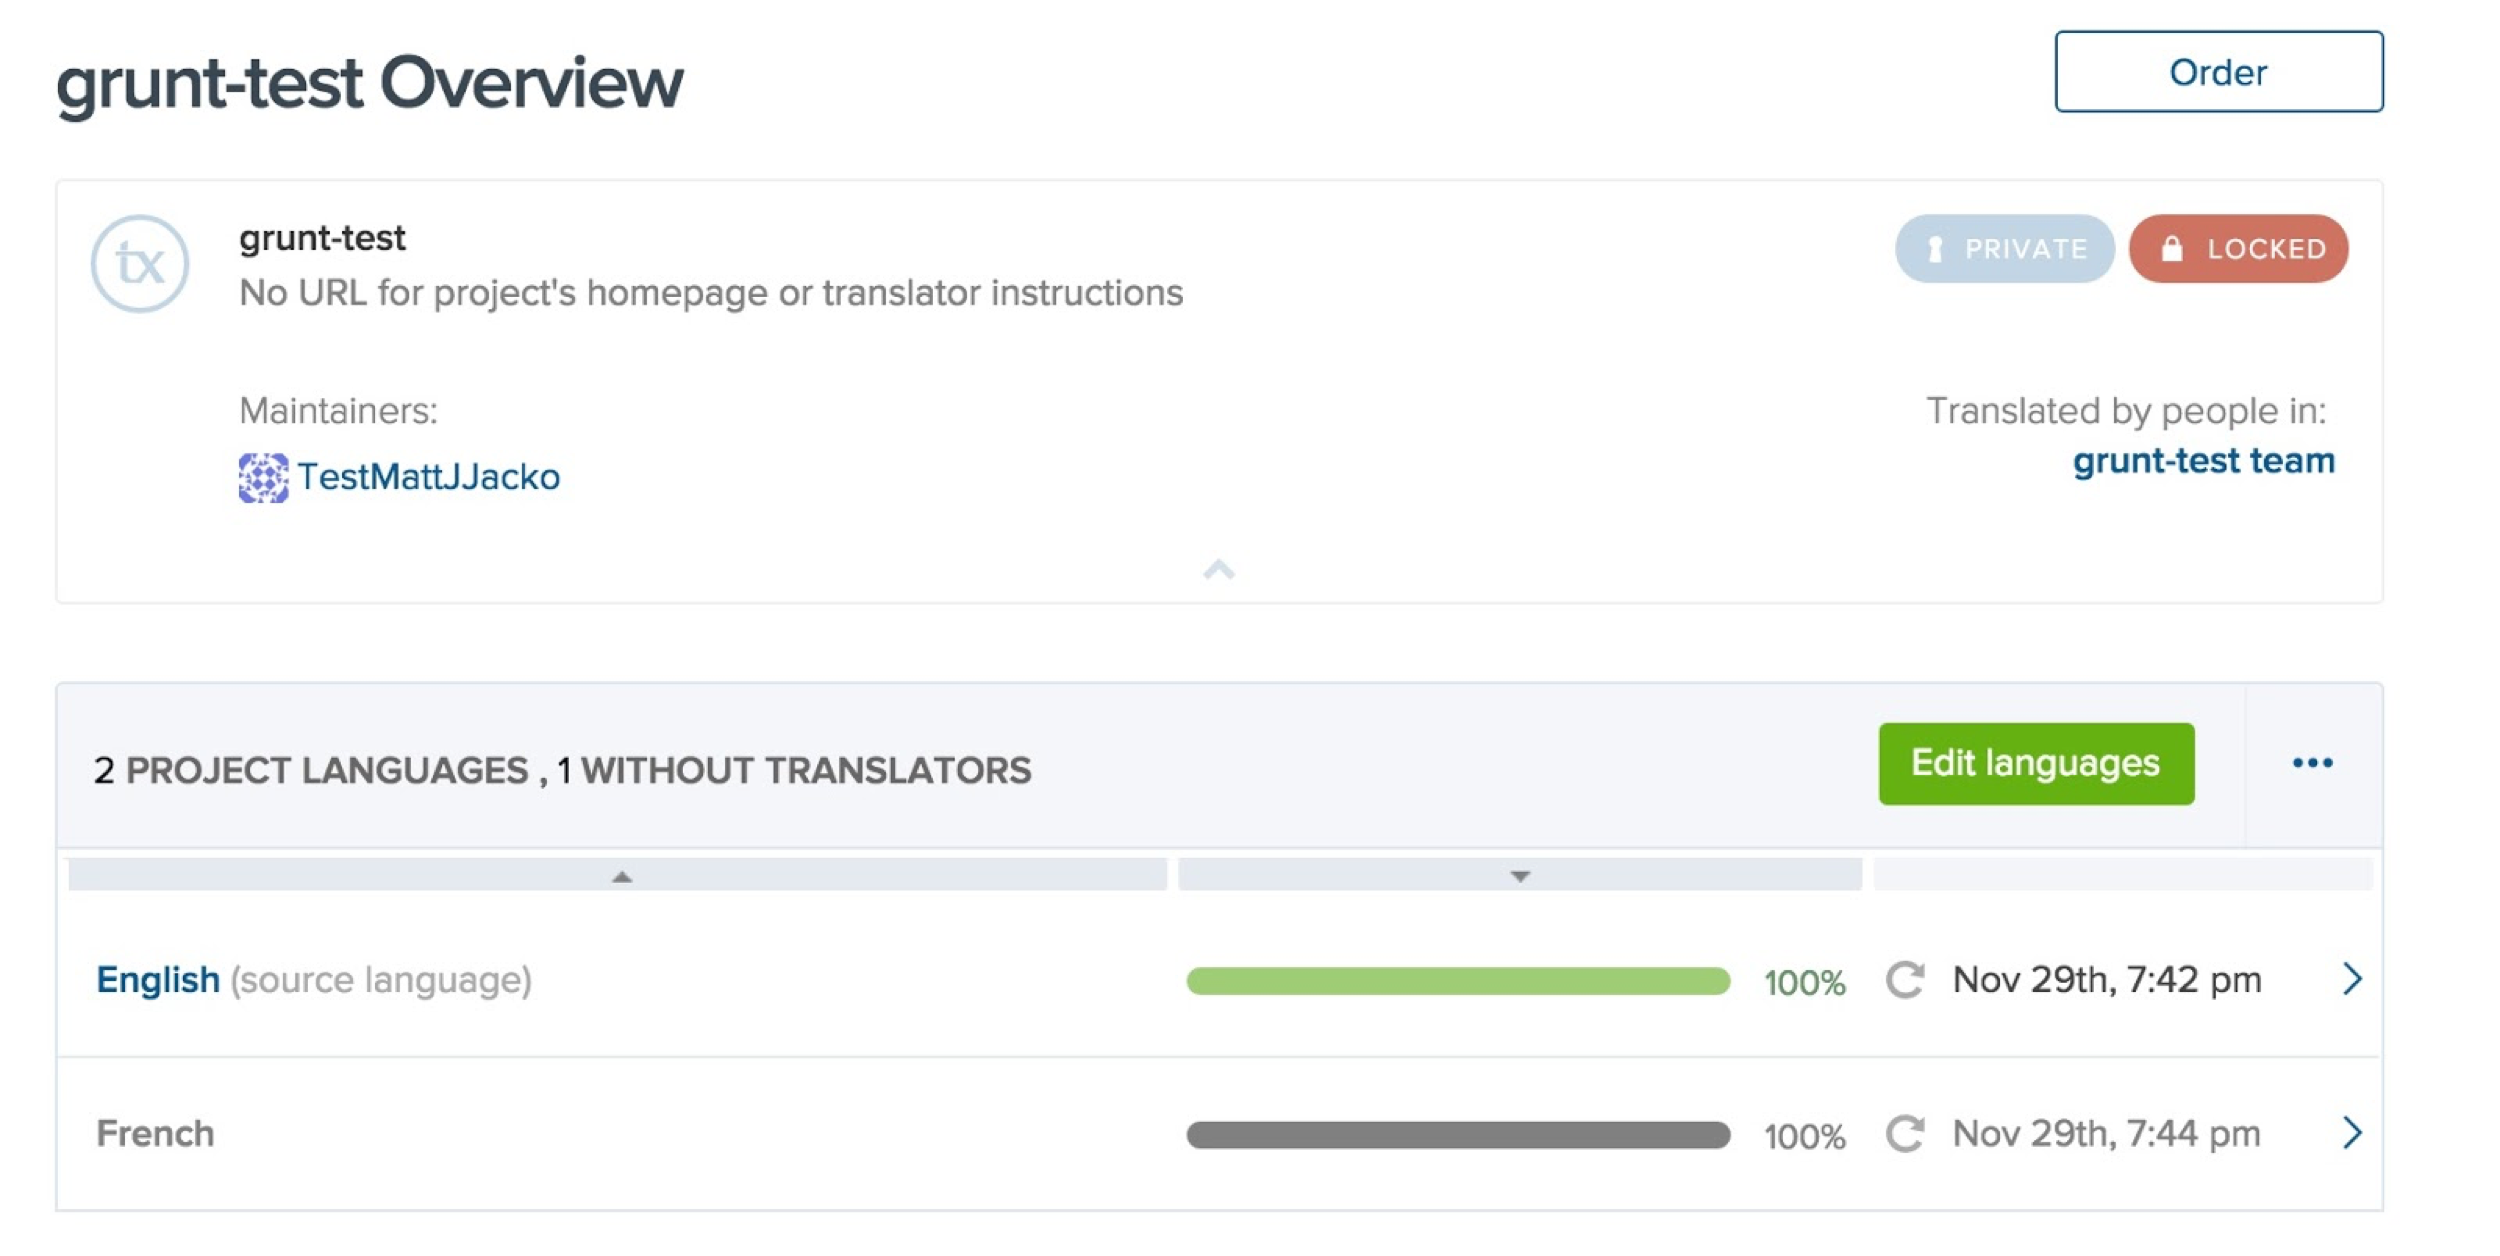
$ grunt transifex
Running "transifex:grunt-test" (transifex) task
>> Successfully downloaded samplejson | fr strings into translations/sample-fr.json

Done, without errors.
And our Transifex project looks like this:
For the ‘gulp-transifex’ package, we will add our credentials to a “config.json” folder stored outside of the project directory. The rest of the configuration occurs inside the Gulpfile.js. Below is an example of this setup for a test project.
var config = require('../config.json');
var env = config.env
var options = {
    user: config.transifex[env].user,
    password: config.transifex[env].password,
    project: 'gulp-test',
    local_path: './translations/'
}

var transifex = require('gulp-transifex').createClient(options)

gulp.task('upstream', function(){
    return gulp.src('./sample.json')
        .pipe(transifex.pushResource())
});

gulp.task('downstream', function(){
    return gulp.src('./sample.json')
        .pipe(transifex.pullResource())
});
Our project directory structure looks like this:
├── gulpfile.js
├── package.json
├── sample.json
└── translations
    └── fr
        └── sample.json
Now our example tasks can be run like this:
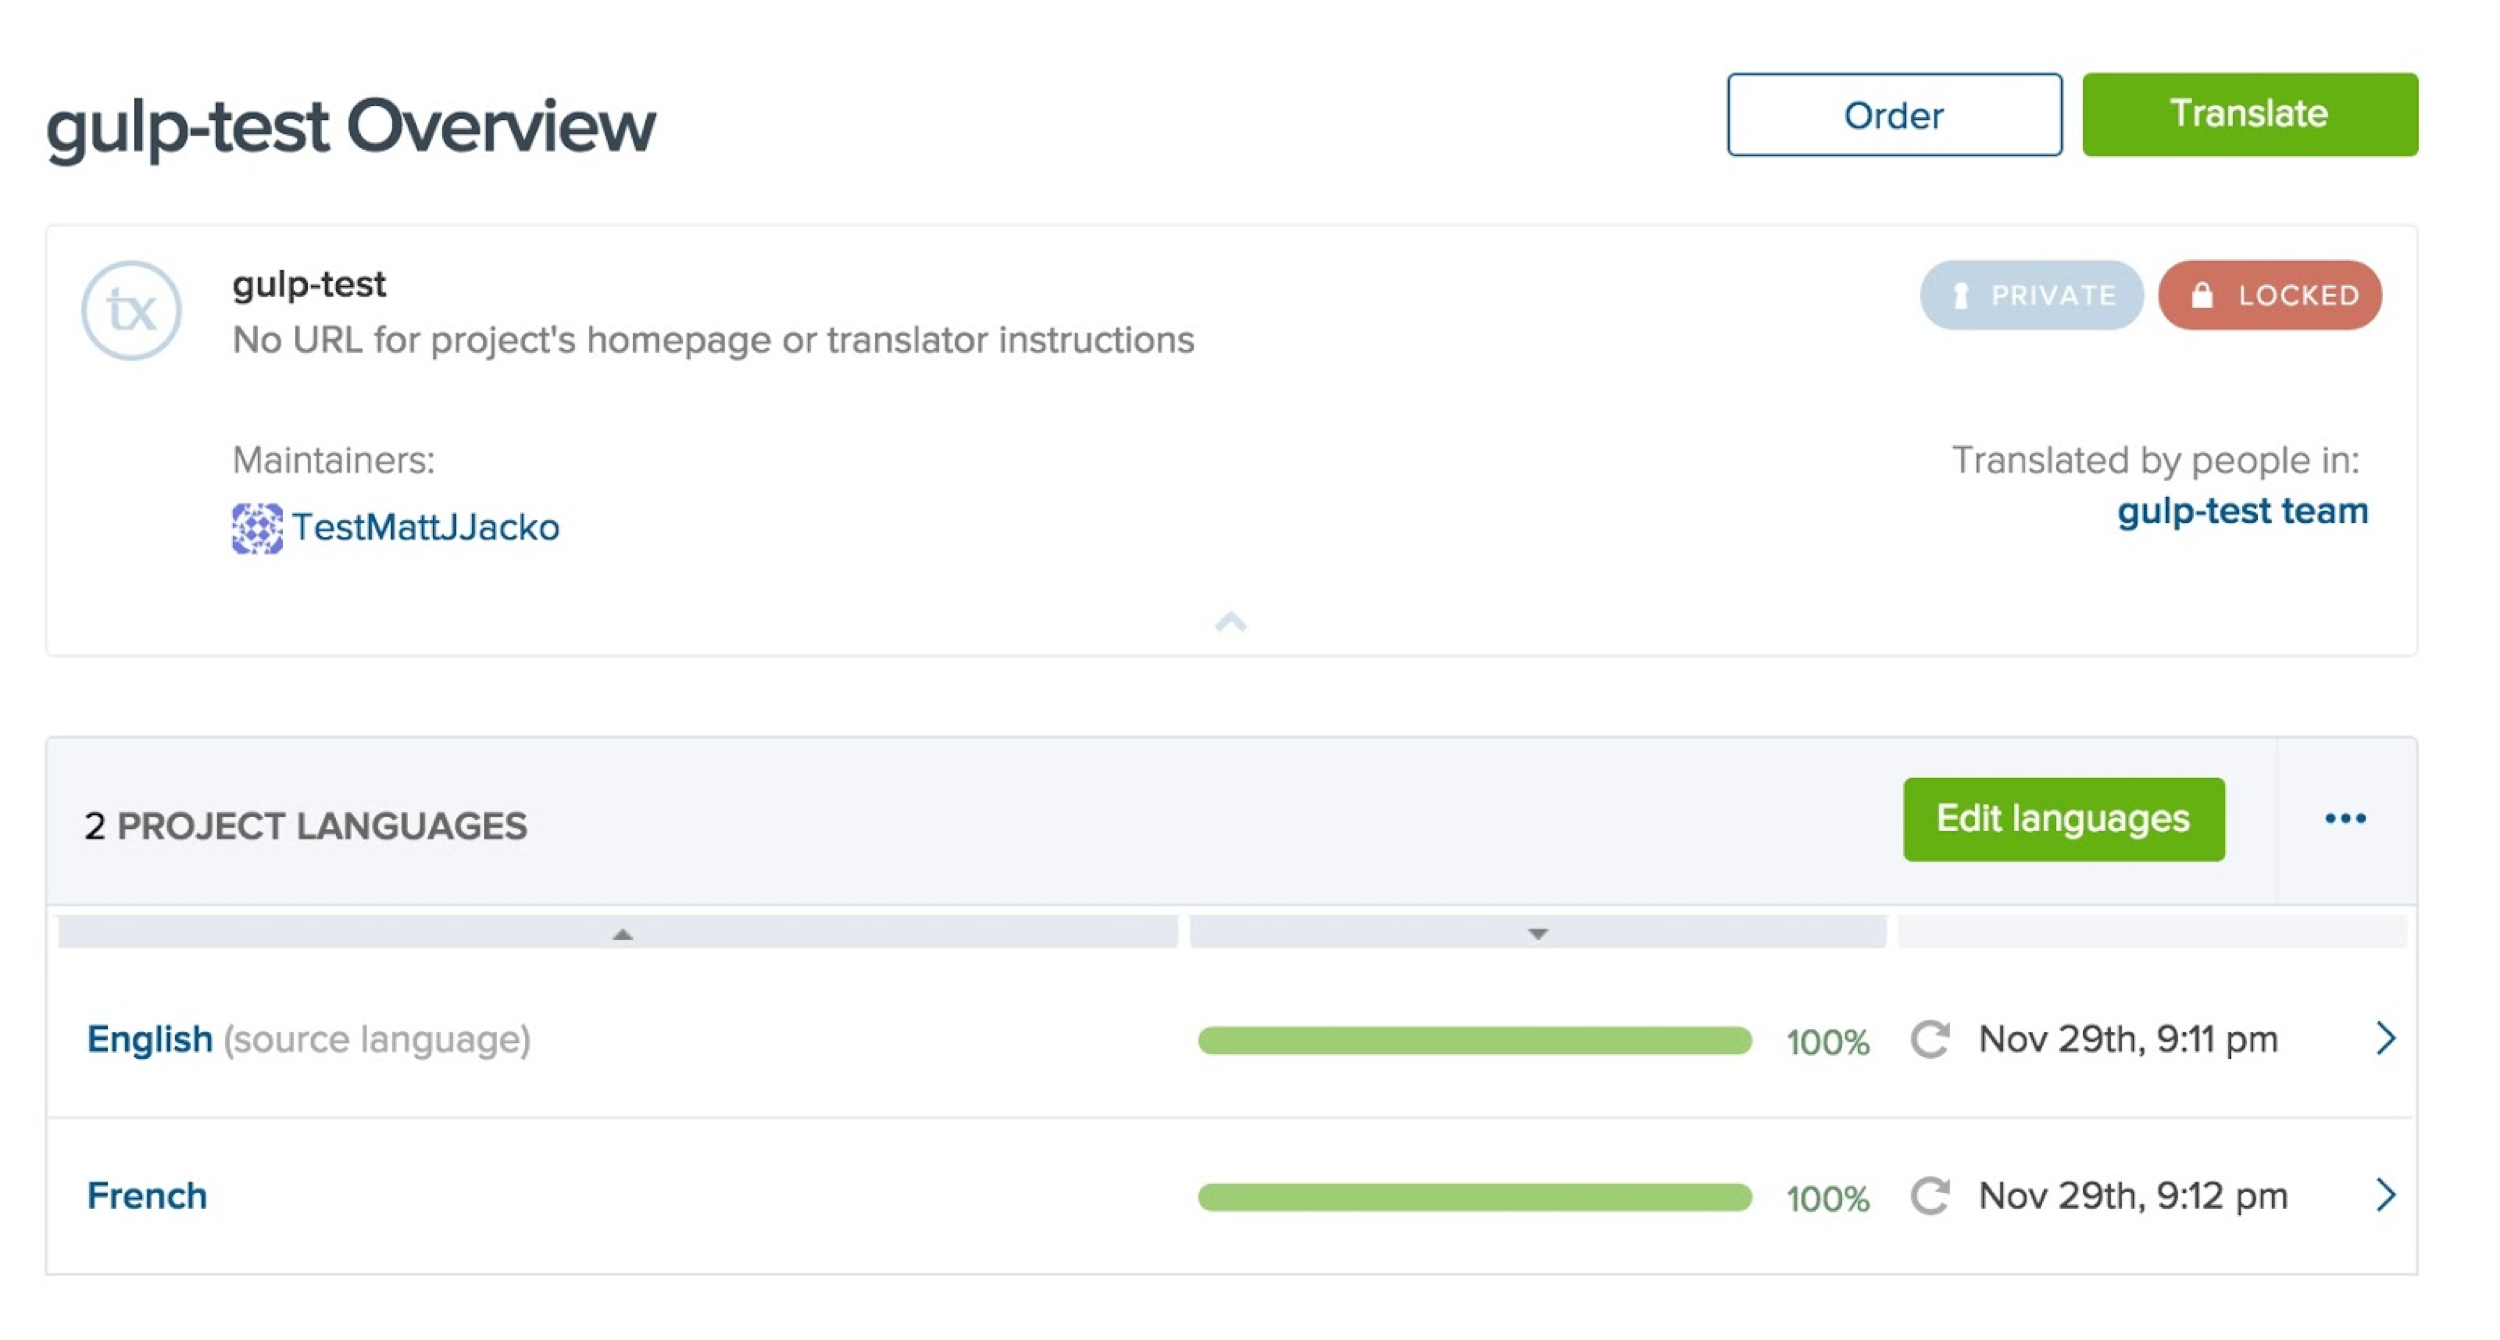
$ gulp upstream
[22:24:01] Using gulpfile ~/wip/node-v4.2.1/gulpjs/gulpfile.js
[22:24:01] Starting 'upstream'...
[22:24:01] updating: sample.json
[22:24:02] no changes done
[22:24:02] ✔ sample.json Uploaded successful
[22:24:02] Finished 'upstream' after 1.74 s

$ gulp downstream
[22:24:35] Using gulpfile ~/wip/node-v4.2.1/gulpjs/gulpfile.js
[22:24:35] Starting 'downstream'...
[22:24:36] Downloading file: sample.json
[22:24:36] ✔ fr sample.json Downloaded:
[22:24:36] File saved
[22:24:36] Finished 'downstream' after 1.46 s
And our Transifex project looks like this:
Now, you’ll be able to automate the download of translation files.
Thanks to Marcos Hernández and tonyskn for their contributions to these projects.